Configuration Context Overview
Overview
The ConfigurationContext is a global object accessible throughout the Akumina Framework. This object stores information about the Akumina Installation. There various properties that come with the default Akumina Install, however, it can also be customized to hold other global information for use throughout your custom implementation. The purpose of this article will be to explain the usage, customization, and implementation of the ConfigurationContext global object in the Akumina Framework.
Caching
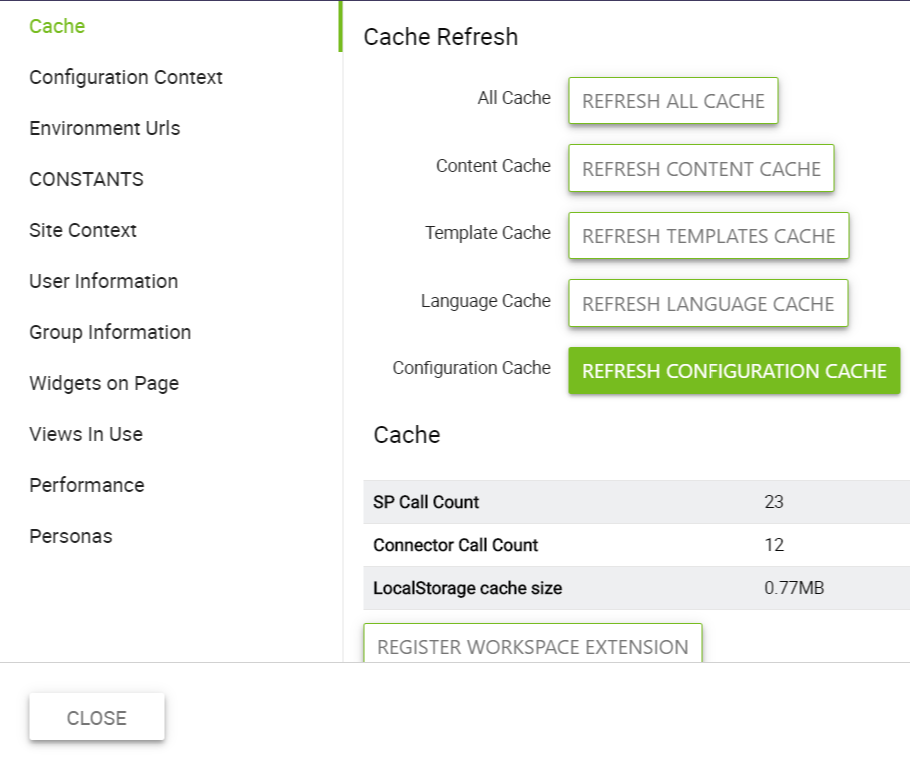
The ConfigurationContext object is cached in App Manager. The cache is only updated on demand to ensure optimum performance. The cache is automatically updated if certain modifications are made from within app manager. If not the Configuration Cache must be cleared. The following items are cached within the configuration cache:
- DigispaceConfigurationIDS_AK
- Persona_AK
- Active Languages from Languages_AK
- All List Names that contain AkuminaPersona Content Type
- PageTypes_AK
- PageLayouts_AK
- ContainerLayouts_AK
- TaxonomyPageRoutes_AK
- Contents of en-us.js (from Style Library)
- AppId of the Akumina app from the app catalog (used in InterchangeLoginURL)
Methods of Adding to ConfigurationContext
Manual List Update
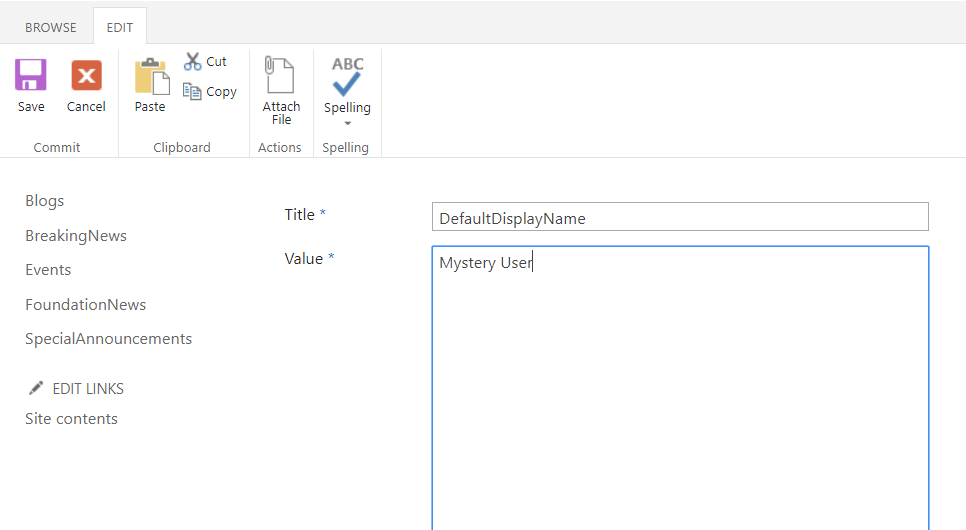
The primary method of adding to the ConfigurationContext object is to save your settings in the DigispaceConfigurationIDS_AK list. The values in the list are saved in a Key-Value-Pair (hereby referred to as KVP) format for easy readability and accessability. For example, let's say you wanted to add a default name for users who do not have a display name set on their account. To accomplish this, you would need to navigate to your site and open Site Contents. From there, open up the DigispaceConfigurationIDS_AK list. This list is automatically provisioned by App Manager on initial load. Once in the list, simply add a new row with the [Title] property being the name of your custom property, so DefaultDisplayName in our example, and the value as appropriate, which would be 'Mystery User' for us. Save the entry, regenerate the Configuration Cache, and your new property should be accessible.
Akumina Project Deployment
The alternative method for editing this list is to use the Akumina Project structure to deploy your changes. For this example, I'll be using Visual Studio Code as the IDE of choice. Your Akumina Project directory should have the following structure:
/projectDir/build/sitedefinitions/
This file holds a structure of items to be updated to the specified list. An example is shown below:
<lists>
  <list name="DigispaceConfigurationIDS_AK" noCrawl="TRUE">
    <Data>
      <Rows>
        <Row>
          <Field Name="Title">SiteLogoURL</Field>
          <Field Name="Value">www.myurl.com/images/logo.png</Field>
        </Row>
      </Rows>
    </Data>
  </list>
</lists>
The purpose of this file is to hold data that will "update" the specified list. Using the Akumina Deployer is a reliable way to make sure your Akumina-specific data is deployed in the proper format. Keeping your edits and additions in your Akumina Project, and maintained by source control, will help synchronize data and changes across individuals, teams, or even departments in your company.
Following the structure of the file, we'll add a new entry with our intended update:
<lists>
  <list name="DigispaceConfigurationIDS_AK" noCrawl="TRUE">
    <Data>
      <Rows>
        <Row>
          <Field Name="Title">SiteLogoURL</Field>
          <Field Name="Value">www.myurl.com/images/logo.png</Field>
        </Row>
        <Row>
            <Field Name="Title">DefaultDisplayName</Field>
            <Field Name="Value">Mystery User</FIeld>
        </Row>
      </Rows>
    </Data>
  </list>
</lists>
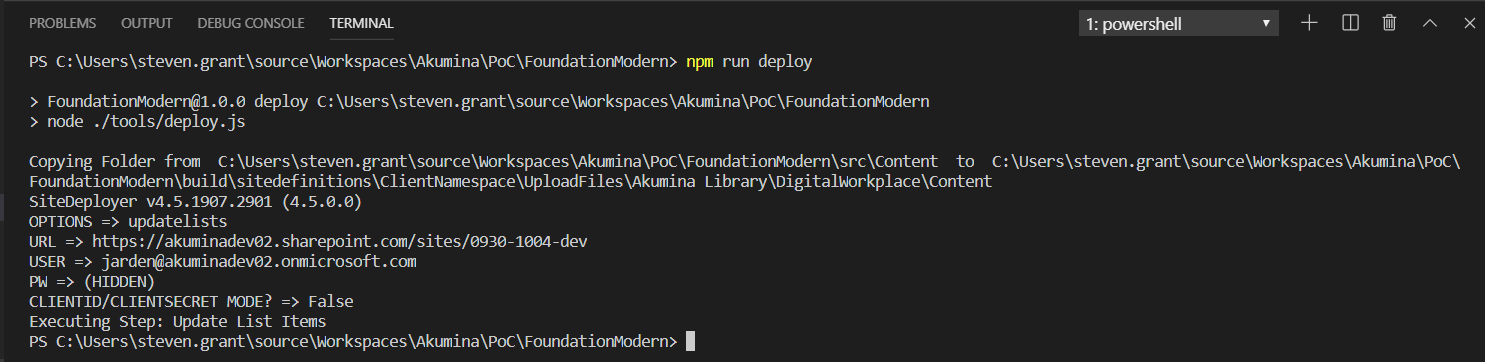
Once you've added the new entry, save the file and navigate over to your "akumina.sitedeployer.config.json" file. This file holds the options for what is deployed when you run the deploy command. Make sure all options are set to FALSE except for the "updatelists" option. This option will tell the deployer to scan your Site Definitions folder for the Update.xml file and push those changes to the Sharepoint site. Once you've set your options, save your changes, make sure your connection and login info in your ".env" file is accurate, and open the Terminal (CTRL+~ by default). Type in the following command:
npm run deploy
You will get some updates on what stage of the deploy process the deployer is currently running. When the process is finished, you should see your cursor blinking on a new terminal line. If there were errors, you will see the log output and some red text denoting exactly what went wrong. Example:
To verify this, simply navigate to the Sharepoint site's Site Contents and open the DigispaceConfigurationIDS_AK list to view your changes. Additionally, you can open the browser debug window (F12 in Chrome) from any page running the Akumina Framework and type in the following:
Akumina.Digispace.ConfigurationContext.Settings.DefaultDisplayName;

Through Javascript
You can also assign a value to the ConfigurationContext object like most Javascript objects:
var sample = 'Akumina rocks!';
Akumina.Digispace.ConfigurationContext.DailyMantra = sample;

console.log(Akumina.Digispace.ConfigurationContext.DailyMantra);
However, because ConfigurationContext is cached in App Manager, this will not persist. How would we persist this data in Javascript? As previously noted, you can add properties to the ConfigurationContext through the digitalworkplace.custom.js file.
Following the previous example, the method to approach this in Javascript would be to add a line to the digitalworkplace.custom.js file. From the above image, locate the "LoaderConfiguration.Custom" function declaration in the custom.js file and add in the following line:
Akumina.Digispace.ConfigurationContext.DefaultDisplayName = 'Mystery User';
When the site loads and the Custom Steps are processed, your new variable will be added to the ConfigurationContext variable. At least, it will be once we refresh the cache manually. Clicking the "Clear Configuration Cache" from the Debug Console will manually regenerate the Configuration Context and make your new additions and edits available.
Furthermore, you could integrate this into a widget that uses the current user's display name as follows:
var userName = '';
if (Akumina.Digispace.UserContext.DisplayName === '') {
    userName = Akumina.Digispace.ConfigurationContext.DefaultDisplayName;
} else {
    userName = Akumina.Digispace.UserContext.DisplayName;
}
Initialization and Usage
The properties contained within the ConfigurationContext object are initialized when the Digital Workplace Core Site is run from the SiteCreator within App Manager. The properties are stored in 3 key locations and are then cached within App Manager until one of the prior mentioned caching events take place, upon which the cache is regenerated. These locations include:
- DigispaceConfigurationIDS_AK List
- digitalworkplace.custom.js
- Azure Table
A note about digitalworkplace.custom.js: The InterchangeURL and InterchangeQueryKey properties are provisioned initially inside of the LoaderConfiguration.Custom object by the SiteCreator. However, additional changes need to be made manually:
To use the ConfigurationContext, simply access the following object from any code executing within the scope of the Akumina Framework. It's worth mentioning, however, that the ConfigurationContext object itself is not an object and will output a function when called directly. You will need to use the browser debug console's intellisense to browse through available properties.
Akumina.Digispace.ConfigurationContext
Example:
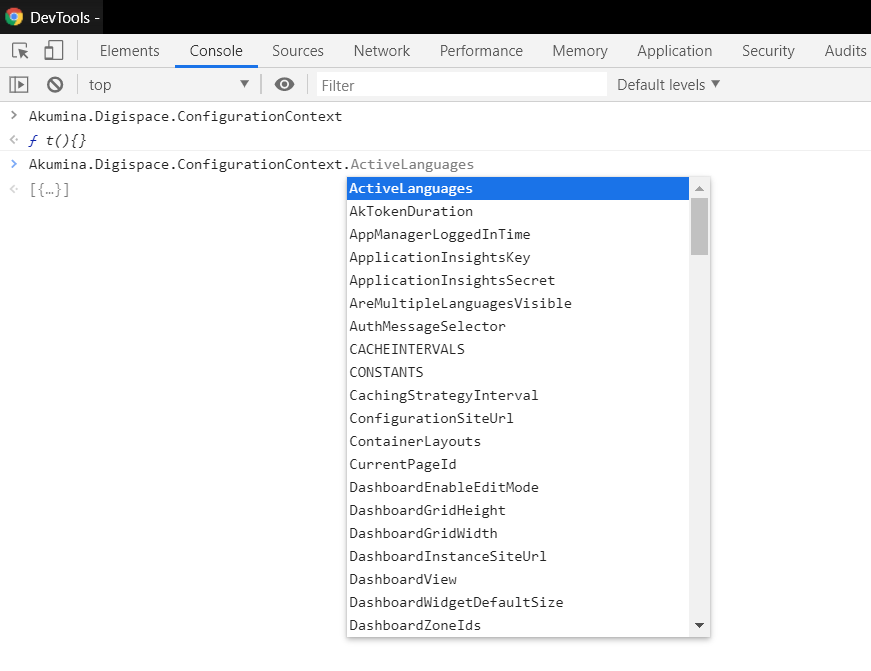
As with any Javascript object, you can view a specific property by specifying the name of the property, such as:
Akumina.Digispace.ConfigurationContext.ActiveLanguages
A note of ConfigurationContent vs ConfigurationContext.Settings
As you may have noticed above, there are two main methods of adding a custom object to the ConfigurationContext and, depending on the method, two different ways of accessing objects through the ConfigurationContext. The differences are detailed below.
Via javascript
Typically through the custom.js file or the env.js file, you're able to explicitly define the shape of your object contained within Configuration Context. If your definition is the following
Akumina.Digispace.ConfigurationContext.Example = 'Akumina rocks!'
Then you will reference it in the same manner:
Akumina.Digispace.ConfigurationContext.Example
Via DigispaceConfigurationIDS_AK
The values from this list are provisioned and cached through App Manager. Given our example above, we created a new entry with a key of [DefaultDisplayName] and a value of [Mystery User]. To access this object through the Configuration Context, we must reference it a little differently:
Akumina.Digispace.ConfigurationContext.Settings.DefaultDisplayName
Custom values are added to the Settings property under Configuration Context instead of the main object.