Custom Site Definition Components
Custom Site Definition Components
A Custom Site Definition will be contained within a C# project
There are three elements within the project that are needed for your custom site definition to work with the Deployment app
- A C# class that inherits SiteProvisionerSiteBase
- C# classes that inherit the ISiteProvisionerStep interface (our steps)
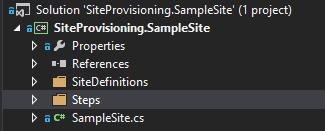
- A SiteDefinitions folder
We will go into each section in depth.
The C# class inheriting the SiteProvisionerSiteBase class
This file inherits the SiteProvisionerSiteBase class and assembles our step classes into a list of steps which is seen in the Deployment App UI. This class is required for the site to show up in the Deployment App dropdown. You may have multiple classes that inherit the SiteProvisionerSiteBase class within a csproj, they will all show up in the Deployment App dropdown. A sample SiteDefinition.cs, called SampleSite.cs, is shown below
public class SampleSite : SiteProvisionerSiteBase
{
    public override string AssetDirectory
    {
        get
        {
            return "SampleSite";
        }
    }

    public override string Javascript
    {
        get
        {
            return "~/SiteDefinitions/SampleSite/ProvisionerFiles/js/samplesite.js";
        }
    }

    public override string FriendlyName
    {
        get
        {
            return "Sample Site";
        }
    }

    public override string ClassName
    {
        get
        {
            return "SiteCreator.SampleSite";
        }
    }

    public override List<ISiteProvisionerStep> Steps
    {
        get
        {
            var _steps = new List<ISiteProvisionerStep>();

            // Ensure AssetDirectory Exists
            _steps.Add(new EnsureAssetDirectoryExists());
            // Ensure site is a Publishing Site
            _steps.Add(new CheckPreReqs());

            //Do something with Sample Step
            _steps.Add(new SampleStep());

            return _steps;
        }
     }
    public override List<SiteProvisionerSettingsField> UserSettings
    {
        get
        {
            return new List<SiteProvisionerSettingsField>();
        }
    }
}
We’ll cover this file by sections
public override string AssetDirectory
We set the AssetDirectory property here, which is used when some steps access the AssetDirectory inside of the SiteDefinitions folder. In this case, our Asset Directory is named SampleSite. Asset Directories will be discussed in depth here.
public override string Javascript
The Javascript property is used to load the provisioning javascript file into your deployment view. The folder path to the provisioning javascript should be set here. We will go into detail here.
public override string FriendlyName
This is the name of the site definition that will show up within the drop down menu of the Deployment Manager App view.
public override string ClassName
This is the class name that the deployment view will refer to your site under. This class name must begin with SiteCreator followed by .UniqueClassName. The class name here must correspond with the class within your provisioning javascript.
public override List Steps
Here is where we add our steps to the step list (so they show up in Deployment Manager App). Our step list must be of the type List
public override List UserSettings
Here is where we add user inputs to the Deployment App. Our input list must be of the type List
SiteProvisionerSiteBase
As we know, our C# class must inherit the SiteProvisionerSiteBase class. Simply put, the SiteProvisionerSiteBase class is an abstract class that fulfills the ISiteProvisionerSite interface and performs some backend work to allow our custom site definition and its steps show up in the Deployment Manager App.
public abstract class SiteProvisionerSiteBase : ISiteProvisionerSite
ISiteProvisionerSite
The SiteProvisionerSiteBase class implements the ISiteProvisionerSite interface, which is shown below
public interface ISiteProvisionerSite
{
    SiteProvisionerProperties Properties { get; set; }
    ApplicationContext Context { get; set; }
    string AssetDirectory { get; }
    string FriendlyName { get; }
    string Javascript { get; }
    List<ISiteProvisionerStep> Steps { get; }
    List<SiteProvisionerSettingsField> UserSettings { get; }
    SiteProvisionerResponse ExecuteSteps();
    SiteProvisionerResponse ExecuteStepByName(string stepName);
}
C# classes that inherit the ISiteProvisioner Step interface
Overview
The Steps folder contains the classes that are executed by the Deployment Manager when we deploy our sites. When we created new steps they will be placed in this folder. Now this raises the question, what makes a regular old C# class a Deployment Manager Step? A step inherits the SiteProvisionStepBase class and implements the ISiteProvisionerStep interface.
public class SampleStep : SiteProvisionerStepBase, ISiteProvisionerStep
ISiteProvisionerStep
The Deployment Manager app is looking for a class to implement the ISiteProvisionerStep interface in order to be considered a step. The interface is shown below
public interface ISiteProvisionerStep
{
    SiteProvisionerProperties Properties { get; set; }
    string StepName { get; }
    List<SiteProvisionerSettingsField> UserSettings { get; set; }

    SiteProvisionerStepResponse Execute();
}
For the Properties property we make use of the SiteProvisionerProperties class to keep track of universal values for the site, which is shown below
public class SiteProvisionerProperties
{
    public SiteProvisionerProperties();

    public string AssetDirectory { get; set; }
    public Dictionary<string, object> Values { get; set; }
}
The SiteProvisionerSettingsField class to provide a format for defining fields for user input
public class SiteProvisionerSettingsField
{
    public SiteProvisionerSettingsField();

    public object DefaultValue { get; set; }
    public string Description { get; set; }
    public string Name { get; set; }
    public bool Required { get; set; }
    public Type Type { get; set; }

    public bool Validate(object val);
}
And the SiteProvisionerStepResponse class for the response from each step upon completion or error
public class SiteProvisionerStepResponse
{
    public SiteProvisionerStepResponse();
    public bool Halt { get; set; }
    public string Message { get; set; }
    public bool Success { get; set; }
}
SiteProvisionerStepBase
Fortunately, the ISiteProvisionerStep interface is completely implemented by the SiteProvisionerStepBase, which consequently allows us to simple override these values within our Step. We can see this in our Sample Step Deployment section. The SiteProvisionerStepBase is shown below
public abstract class SiteProvisionerStepBase : ISiteProvisionerStep
{
    protected SiteProvisionerStepBase();

    public SiteProvisionerProperties Properties { get; set; }
    public abstract string StepName { get; }
    public List<SiteProvisionerSettingsField> UserSettings { get; set; }

    public abstract SiteProvisionerStepResponse Execute();
    protected string GetProperty(string name);
    protected string GetSiteId();
    protected int GetUnitOfWork();
    protected void SetSiteId(string siteId);
    protected void SetUnitOfWork(int unit);
}
Example Step
Below we have the AddPages.cs step. Allow us to ‘step’ through it for a deeper exploration the step architecture.
using Akumina.SiteProvisioning.Common.Models;
using Akumina.SiteProvisioning.Core;
using Akumina.SiteProvisioning.Core.Interfaces;
using Akumina.SiteProvisioning.Core.Services;
using System;
using System.Collections.Generic;
using System.Linq;
using System.Text;
using System.Threading.Tasks;

namespace SiteProvisioning.SampleSite.Steps
{
    public class AddPages : SiteProvisionerStepBase, ISiteProvisionerStep
    {
        public override string StepName
        {
            get
            {
                return "Adding Pages";
            }
        }

        public override SiteProvisionerStepResponse Execute()
        {
            var response = new SiteProvisionerStepResponse();

            PageService pageService = new PageService();

            try
            {
                pageService.AssetDirectory = this.Properties.AssetDirectory;
                pageService.SiteId = this.GetSiteId();

                pageService.AddPages();

                response.Message = "Pages Added";
                response.Success = true;
            }
            catch (Exception ex)
            {
                response.Message = ex.Message;
                response.Success = false;
            }

            return response;
        }
    }
}
We’ll cover this file in sections
public override string StepName
We’re setting the StepName property here to Adding Pages. The StepName is the name of the step in the Deployment Manager App UI.
public override SiteProvisionerStepResponse Execute()
Here is where we execute the work done by the step itself. Our backend code is executed in the PageService class, it is always good practice to export the work done by the step to another class. We return a SiteProvisionerStepResponse object from our Execute method. The response determines the success or fail message within the UI.
SiteDefinitions Folder
The Site Definitions folder contains our AssetDirectory folders. Each AssetDirectory folder contains all assets needed for the deployment of the respective site (branding files, layouts, xml files). The name of our AssetDirectory is important as we will be referring to it within all of our deployment steps when referencing these files. The Site Definitions folder may have multiple Asset Directories.
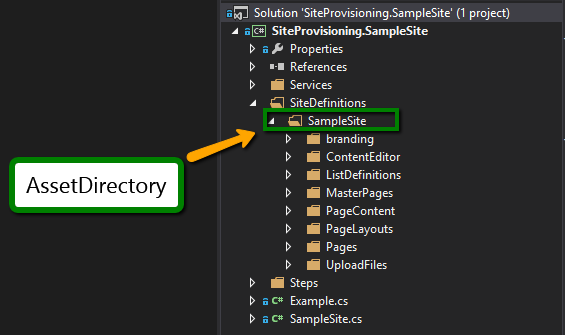
Within the AssetDirectory folder is the following framework.
Branding
The Branding folder contains all files that will be provisioned into the Style Library list upon deployment. The directories listed below will maintain their structure under the AssetDirectory folder within the Style Library when utilizing the OOB steps we provide with SampleSite deployer. Any files we want deployed to the Style Library should be placed within one of the listed directories.

content
Store your Mustache templates within the templates folder inside of the content directory
css
Store custom css for the site definition within the CSS folder.
img
Store images in the img folder
js
Store custom js for the site definition within the js folder.
ContentEditor
The ContentEditor folder contains the ContentEditor.xml file, we need this for deploying our widgets. Do not edit or delete this file.
ContentTypes
The ContentTypes folder contains information that the Deployment Manager App uses to create content types on a site. This information is stored in an xml file called ContentTypes.xml. Edit this file to add addition content types to the site. We will discuss how to do so in the Custom Site Definition XML section.
ListDefinitions
The ListDefinitions folder contains information that the Deployment Manager App uses to create lists on a site. This information is stored in an xml file called Lists.xml. Edit this file to add additional lists to the site. We will discuss how to do so in the Custom Site Definition XML section
MasterPages
The MasterPages folder will contain a single html file. The html file is deployed to the site’s Master Page Gallery, an associated .master file is generated, and the master page is set as the site master page with the AddMasterPageFiles.cs step. There can only be one html file in this directory for the masterpage deployment. This will need to be in the proper html master page format in order for the deployment to work, otherwise SharePoint will throw errors. Use the samplemaster.html in the SiteProvisioning.SampleSite as a model for a simple master page. For more info on creating Master Page html, see https://msdn.microsoft.com/en-us/library/office/jj822370.aspx.
PageContent
The PageContent folder contains information that the Deployment Manager App will use to add content to the pages we create. This information is stored within an xml file called pages.xml. Edit this file to specify content markup you want on each page. We will discuss how to do so in the Custom Site Definition XML section.
PageLayouts
The PageLayouts folder is where we store the page layouts we want deployed to our site’s Master Page Gallery by the AddPageLayouts.cs step. Inside of the file will be our page layouts (.aspx files) and an Elements.xml file, which informs the deployer of what layouts to deploy. When you add a page layout to this folder, you will need to edit the Elements.xml file accordingly. We will discuss how to do so in the Custom Site Definition XML section.
Pages
The Pages folder designates the pages that are deployed to the Pages Library of our site. This information is stored within an xml file called Elements.xml. Edit this file to add additional pages to the site. We will discuss how to do so in the Custom Site Definition XML section.
ProvisionerFiles
Within the ProvisionerFiles folder we will store our provisioning javascript. Having a provisioning javascript file is required for the deployment view to function.

The base provisioning javascript is shown below. This file can be modified to enhance the UI functionality of the deployment view
var SiteCreator = SiteCreator ? SiteCreator : {};

if ((typeof SiteCreator.SampleSite) === 'undefined') {
    SiteCreator.SampleSite = function () {
        var _cur = this;

        this.Init = function (model) {
            SiteCreator.Eventing.Subscribe('/SiteCreator/DeployButtonclick/', _cur.OnDeploymentClick);
            SiteCreator.Eventing.Subscribe('/SiteCreator/SelectActionChange/', _cur.SelectActionChange);
            SiteCreator.Eventing.Subscribe('/SiteCreator/SiteChange/', _cur.OnSiteChange);
            SiteCreator.Eventing.Subscribe('/SiteCreator/GetFeatureName/', _cur.GetFeatureName);
            _cur.className = model.className;
            _cur.siteContainerId = model.siteContainerId;
        };

        this.OnDeploymentClick = function (model) {
            BaseDeployment(model, _cur.siteContainerId);
        };

        this.SelectActionChange = function (model) {
            if (model.siteContainerId == _cur.siteContainerId) {
                //Detect Add mode
                if ($('input[type=radio][name=select-an-action][value=CreateNewInstallation]').is(':checked')) {
                }//Detect Update mode
                else if ($('input[type=radio][name=select-an-action][value=UpdateConfigurationSettings]').is(':checked')) {
                }
            }
        };

        this.OnSiteChange = function (model) {
            if (model.siteContainerId == _cur.siteContainerId) {
                $("#selectActionDiv").show();
                $("#updateConfigOption").hide();
            }
        };

        this.GetFeatureName = function (model) {
            BaseGetFeatureName(model, _cur.siteContainerId);
        };
    }
};
Note: You must replace SiteCreator.SampleSite with the ClassName property you defined in your C# class that inherits the SiteProvisionerSiteBase class. Otherwise you will get errors.
UploadFiles
The UploadFiles folder contains all files that we want uploaded to SharePoint file libraries within our site via the UploadFiles.cs step. We can designate the library that we want our files uploaded to by the name of the subdirectory under our UploadFiles folder. In the example below, we are uploading files into the Documents, Images, Images_AK, and Site Collection Images libraries.
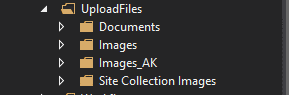
The UploadFiles.cs step treats these subdirectories as the libraries themselves and copies the file structure underneath into the corresponding SharePoint library. For example, if we wanted to upload the Saturday.docx into the Documents library and the Tuesday.docx into a folder called Weekdays inside of the document library, we would arrange our file structure as shown below

References
To learn how to leverage the Deployment Manager SDK see the following articles: