Quickstart
Service Hub: Endpoint QuickStart
Overview
This article provides a quick start with how to setup a Service Hub Endpoint. A service hub endpoint provides data that is consumed by a widget inside an Akumina site. Some examples of data that can be supplied are:
- User profile data
- Data from 3rd parties such as Concur or ServiceNow
- Database information
Prerequisites
For this example, you will need the following:
- Visual Studio
- Note, you need .Net Framework version 4.7.1 or above
- The Service Hub example currently located at: https://github.com/akumina/AkuminaSamples/tree/master/Sample.Web.Api
- A working App Manager, 4.5 and above
- FTP or other access to that App Manager so that you can download and upload files
Setting up the project.
Extract the Service Hub example into a path locally, example:
C:\akumina\ServiceHub\Quickstart
In that path, create a new folder, "packages" and under that a folder named "akumina".
C:\akumina\ServiceHub\Quickstart\packages\akumina
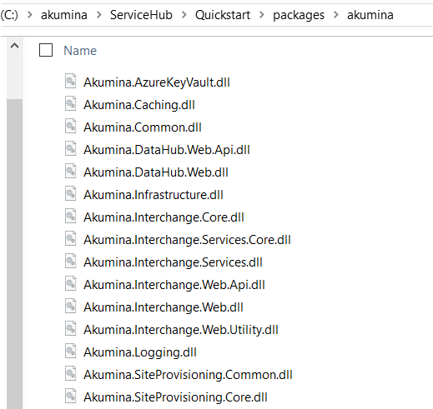
From your AppManager, download the contents of the bin folder to this path, so that you see the Akumina .dll files present:

Fix references
Using Visual Studio, open the solution file Sample.Web.Api.sln in the path C:\akumina\ServiceHub\Quickstart. Remove the following references, and then re add from the path above, using your App Manager DLLs:
- Akumina.AzureKeyVault
- Akumina.Caching
- Akumina.Common
- Akumina.DataHub.Web
- Akumina.DataHub.Web.Api
- Akumina.Infrastructure
- Akumina.Interchange.Core
- Akumina.Interchange.Services
- Akumina.Interchange.Services.Core
- Akumina.Interchange.Web
- Akumina.Interchange.Web.Api
- Akumina.Interchange.Web.Utility
- Akumina.Logging
From the Build menu, select Build Solution. The solution will build properly.
HelloWorld Endpoint
We will now create a Hello World Endpoint. To do so, we will need a new API controller.
NOTE: we already have the DemoController - we will come back to that.
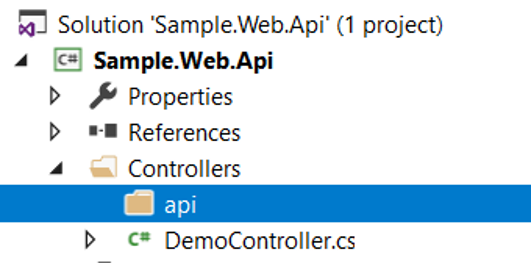
In the Controllers folder, add a subfolder named "api":

In that folder, add a new Class named HelloWorldController.cs. In the controller, add in the following code:
using System;
using System.Collections.Generic;
using System.Linq;
using System.Net;
using System.Net.Http;
using System.Text;
using System.Threading.Tasks;
using System.Web;
using System.Web.Http;

namespace Sample.Web.Api.Controllers
{
    public class HelloWorldController : ApiController
    {
        private readonly HttpContext _ctx = HttpContext.Current;

        public HttpResponseMessage Get()
        {
            return Request.CreateResponse(HttpStatusCode.OK, "Hello world");
        }
    }
}
Build the solution again; you should receive no errors.
Deploy the Endpoint
To deploy the endpoint, take the resulting Sample.Web.Api.dll produced at
C:\akumina\ServiceHub\Quickstart\Sample.Web.Api\obj\Debug
And upload it to your AppManager's BIN folder (either via FTP or otherwise).
Test the Endpoint
The Endpoint will now be available at the following url:
https://{appmanagerurl}}/api/ helloworld
As shown here:

UserData Endpoint
The UserData endpoint explores several higher-level concepts with the Service Hub. These include:
- The use of a return object with a custom status code to control what is returned
- Separating the controller from the business logic by using a service
- Leveraging existing Akumina APIs
- Determining whether the current user is logged into the App Manager
We will need several new files, and we create each of these.
Response object
We will use a custom response object so we can define what is returned from the API. As a best practice, we would like a common way to read messages and application status, distinct from HTTP status codes.
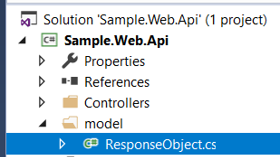
In the project root, create a folder "model" and add a new Class named ResponseObject.cs.

Add in the following code:
using System;
using System.Collections.Generic;
using System.Linq;
using System.Text;
using System.Threading.Tasks;

namespace Sample.Web.Api.Model
{
    public class ResponseObject
    {
        public ResponseObject()
        {
            this.Items = new List<ResponseItem>();
        }

        public string Code { get; set;}
        public string Message { get; set;}
        public List<ResponseItem> Items { get; set;}
    }

    public class ResponseItem
    {
        public string Id { get; set;}
        public string Title { get; set;}
        public string Description { get; set;}
    }
}
Build the solution; you should receive no errors.
Service
We next want to add a service - this organizes our functionality into a specific class separate from the controller.
NOTE: In production implementations, we would have this in its own separate Visual Studio project, but for our examples here we have it inside our project.
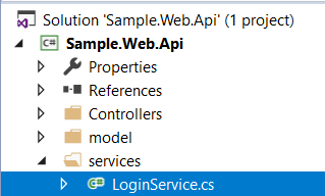
In the project root, create a folder "services" and add a new Class named LoginService.cs.

Add in the following code:
using Akumina.Interchange.Core.Entities;
using Akumina.Interchange.Core.Factory;
using Akumina.Interchange.Core.Interfaces;
using Akumina.Logging;
using System;
using System.Collections.Generic;
using System.Linq;
using System.Text;
using System.Threading.Tasks;

namespace Sample.Web.Api.Services
{
    public class LoginService
    {
        public LoginService(){}
        public bool IsUserLoggedIn()
        {
            var loggedIn = false;
            var userSvc = ObjectFactory.Get<IUserService>();

            try
            {
                loggedIn = userSvc.IsAuthorized();
            }
            catch (Exception ex)
            {
                TraceEvents.Log.Error(ex);
                loggedIn = false;
            }

            return loggedIn;
        }

        public MappingUser GetCurrent()
        {
            MappingUser user = null;
            var userSvc = ObjectFactory.Get<IUserService>();

            try
            {
                user = userSvc.GetCurrent();
            }
            catch (Exception ex)
            {
                TraceEvents.Log.Error(ex);
            }

            return user;
        }
    }
}
Build the solution again; you should receive no errors.
In our service we have 2 methods that show us how to determine login state and also access data from the Akumina APIs:
- IsUserLoggedIn - determines if the user is currently logged into the AppManager
- GetCurrent - If logged in, then it will return info about the current user
In both, note the call to the Akumina ObjectFactory, in this case the IUserService:
var userSvc = ObjectFactory.Get<IUserService>();
In later examples we will explore other services:
Controller
Finally, we need a controller to provide the URL to get user information. In the Controllers folder, in the "api" subfolder, add a new Class named UserDataController.cs. In the controller, add in the following code:
using Sample.Web.Api.Model;
using Sample.Web.Api.Services;
using System;
using System.Collections.Generic;
using System.Linq;
using System.Net;
using System.Net.Http;
using System.Text;
using System.Threading.Tasks;
using System.Web;
using System.Web.Http;

namespace Sample.Web.Api.Controllers
{
    public class UserDataController : ApiController
    {
        private readonly HttpContext _ctx = HttpContext.Current;

        public HttpResponseMessage Get()
        {
            var response = new ResponseObject();
            var loginService = new LoginService();

            if (loginService.IsUserLoggedIn())
            {
                var user = loginService.GetCurrent();
                var userLogin = user.LoginName;

                // get from 3rd party system XYZ

                // get from SP list

                // GetSPListData()

                // merge notifications

                // do stuff

                // response.Items = etc......

                response.Message = "User logged in: " + userLogin;
                response.Code = "200";
            }

            else
            {
                response.Message = "User not logged in";
                response.Code = "401";
            }

            return Request.CreateResponse(HttpStatusCode.OK, response);
        }
    }
}
Build the solution again; you should receive no errors.
In our controller we have a method that calls the LoginService to determine whether the current user is logged into the App Manager. If so, then we display the login name. If not, we return a message that the user is not logged in.
NOTE: We also provide our own status codes, 200 and 401, all while using the HTTP status code 200 (OK). This is so we can handle any errors within our widgets.
Deploy the Endpoint
Deploy the endpoint using the same instructions as above.
Test the Endpoint
The Endpoint will now be available at the following url:
https://{appmanagerurl}}/api/ userdata
As shown here:

Try logging out and then hit the API again:

Akumina Widget
To make use of the Endpoint data you would use an Akumina widget. This widget is actually quite simple – you would use the same pattern you would call a third party RESTFUL API to obtain data. Several examples are below:
Building A Custom Widget: Flickr Image Library https://github.com/akumina/AkuminaTraining/wiki/Building-A-Custom-Widget:-Flickr-Image-Library
Building A Custom Widget: Stock Ticker Widget https://github.com/akumina/AkuminaTraining/wiki/Building-A-Custom-Widget:-Stock-Ticker-Widget
