Widget Picker
Overview
This article will be used to elaborate and illustrate the usage, configuration, installation, and implementation of the Akumina Widget Picker in a Sharepoint Modern environment. The installation assumes the following requirements are satisfied:
- Central Site with Akumina Framework Version 4.8 or higher (More)
- Delivery Site created in Sharepoint Modern
Downloads
akumina-widget-picker.spkg (Coming Soon!)
Glossary of Terms
| Name | Definition |
|---|---|
| AWP SPKG | Akumina Widget Picker SPKG |
| AWP | Akumina Widget Picker |
| Akumina Private Library | A Library holding digitalworkplace.env.js and any other files that should not be synced to CDN services |
| digitalworkplace.env.js | Environment JS file holding environment-specific variables and settings |
What is the AWP?
AWP stands for Akumina Widget Picker. This Client Side Solution was developed with the intent of answering the question of a Sharepoint Modern driven environment with Akumina widgets. To illustrate this further, let's review how Akumina handles the Sharepoint Page experience currently.
In Classic, the natively supported Master Page renders page content within it. This page content is defined in an aspx file that hold the contents of the page. Within these page contents, widgets exist. The Master Page template is the beginning and the end of the native Sharepoint functionality. After the Master Page is rendered, the Akumina Framework loads and starts parsing page content to replace placeholder divs with rendered widget views.
In the current Sharepoint Classic implementation, the Akumina Framework loads very early in the page lifecycle and takes command of the page. The purpose of the AWP is to reverse this implementation and let the Sharepoint Foundation run the page lifecycle itself while only provisioning specific Akumina assets, such as widgets.
Additionally, similar to the Akumina SPA, the Akumina Widget Picker also supports the ability to inject custom JS from the Central Site Collection. This value is set in the digitalworkplace.env.js which is explained in more detail below.
Setup & Installation
Since the AWP is designed to only be injected into Modern Sharepoint pages, the installation for the Delivery Site is very lightweight and straight-forward. Simply add the akumina-widget-picker client side solution to your Sharepoint Site from the App Catalog.
Next, you will need to configure one file. Create a new Document Library named "Akumina Private Library". Within it, we will create a new file: digitalworkplace.env.js. The env.js file is used for setting custom values on ConfigurationContext, UserContext, window objects, etc. The bare minimum implementation for digitalworkplace.env.js is:
digitalworkplace.env.js
if ((typeof AkuminaModernConfiguration) === 'undefined') {
    AkuminaModernConfiguration = {
        CentralSiteCollectionUrl: "{1}", // Central Site from which assets are provisioned
        FrameworkVersion: "{2}", // The framework version; should match Central Site
        WidgetPicker: { // Akumina Widget Picker Settings
            ExtraJSFiles: "", // Comma delimited list of JS files to download from the central site
            ExtraCSSFiles: "", // Comma delimited list of CSS files to download from the central site
            AssetLibraryName: "Akumina Library" // Name of the local asset library
        },
        ApplicationExtension: { // Application Extension Settings
            ExtraCSSFiles: "", // Comma delimited list of CSS files to download from the central site
            HideSiteHeader: false, // Boolean value determining whether the modern header should be hidden
            HideCommandBar: false, // Boolean value determining whether the modern command bar should be hidden
            ShowOnlyOnSitePages: true, // Boolean value determining whether only SitePage navigation should be enabled
            AssetLibraryName: "Akumina Library" // Name of the local asset library
        }
    }
}
var LoaderConfiguration = LoaderConfiguration || {};
if ((typeof LoaderConfiguration.Custom) === 'undefined') {
    //Add shipped steps to loader
    LoaderConfiguration.Custom = {
        Init: function (config) {
            Akumina.Digispace.ConfigurationContext.InterchangeURL = "{3}";
            Akumina.Digispace.ConfigurationContext.InterchangeQueryKey = "{4}";
         }
    };
}
Within the file, we would update the following variables:
- Central or Standalone Site URL: {1} = https://akuminadev02.sharepoint.com/sites/spfx-developersite-032720
- Akumina Framework Version from CDN: {2} = 4.8.2004.1501
- App Manager Url: {3} = https://monday.onakumina.com
- App Manager QueryKey: {4} = acf67d91-435e-42c8-8f8f-d66ec732305a
CONNECTING STAND ALONE SITE STEPS ONLY START (NOT REQUIRED FOR CENTRAL SITE)
If this is a standalone site, a manual step is required (You do not need to do in Central site or for additional delivery sites and this needs to be done only once)
- Add to DigispaceConfigurationIDS_AK the Key CentralPipedSiteIdWebId
- The value of that key will be SiteId_WebId, which can be found by taking the values from
- {StandAloneSiteUrl}/_api/site/id = 9627f52f-5645-4267-aef2-9836a6be41bb
- {StandAloneSiteUrl}/_api/web/id = 1115da82-3dfc-4993-b736-4fbcbe4a5e02
- This gives us the combined value of: 9627f52f-5645-4267-aef2-9836a6be41bb_1115da82-3dfc-4993-b736-4fbcbe4a5e02
After the value has been added, refresh Configuration Cache in 'Update Configuration Settings' option from the Site Creator in Stand Alone site. Then in the Site using the Widget Picker functionality you can verify that your setting matches by typing into console
Akumina.Digispace.ConfigurationContext.CentralPipedSiteIdWebId
It should show the value in the DigispaceConfigurationIDS_AK
With the digitalworkplace.env.js file created and the app installed on the site, we're ready to start creating pages. For this example, we'll create a new page and walk through the process of adding a single widget to it.
Create a new blank page. Once the page loads, you should see something similar:
![]()
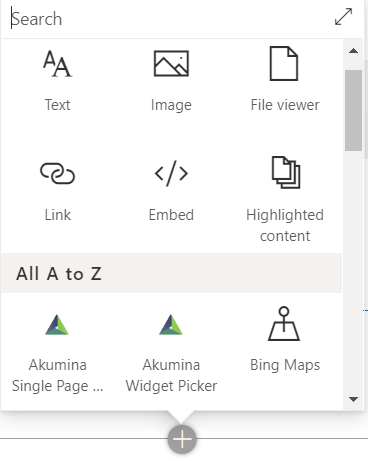
Under the text section, you'll notice a Plus (+) icon offering the option to add a new web part in the column. Click on the button and you'll see the following options:
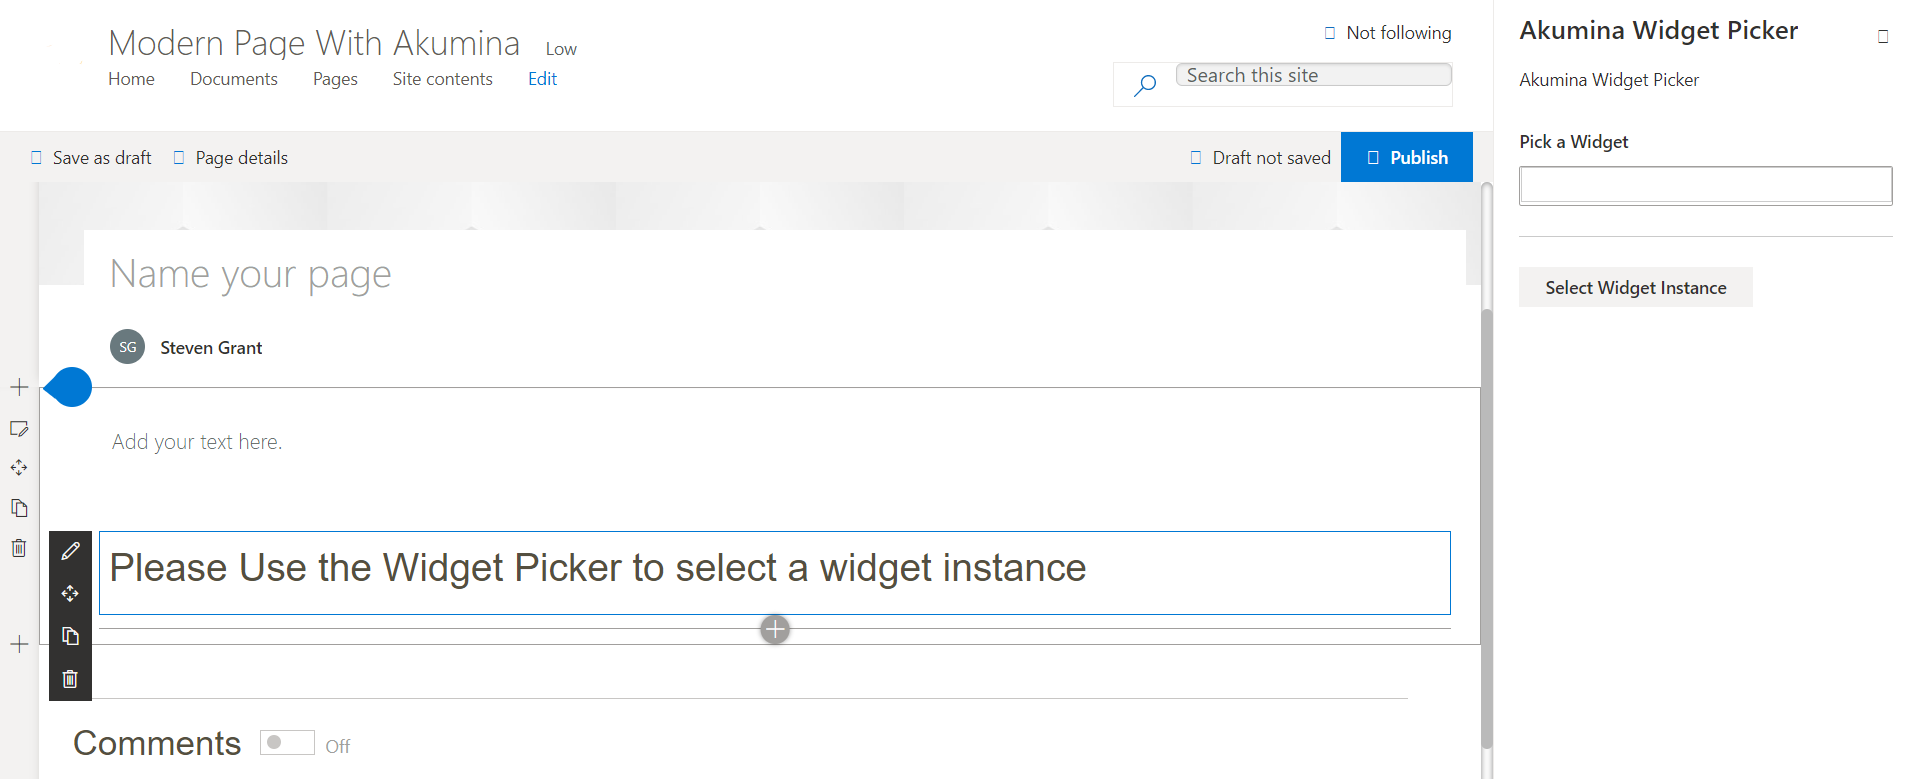
Add the Akumina Widget Picker web part to the section. It will briefly display a message indicating that it is loading the Akumina Framework from the Central Site you defined in your env.js. After the Framework has loaded, you should see a message telling you to use the Widget Picker to select a widget instance. Click on the Pencil icon to bring up the web part settings page. You will see the following:
Click on the "Select Widget Instance" button to load a window containing all Widget Instances located on the Central site. Scroll through the list to find your desired widget and right click on it:
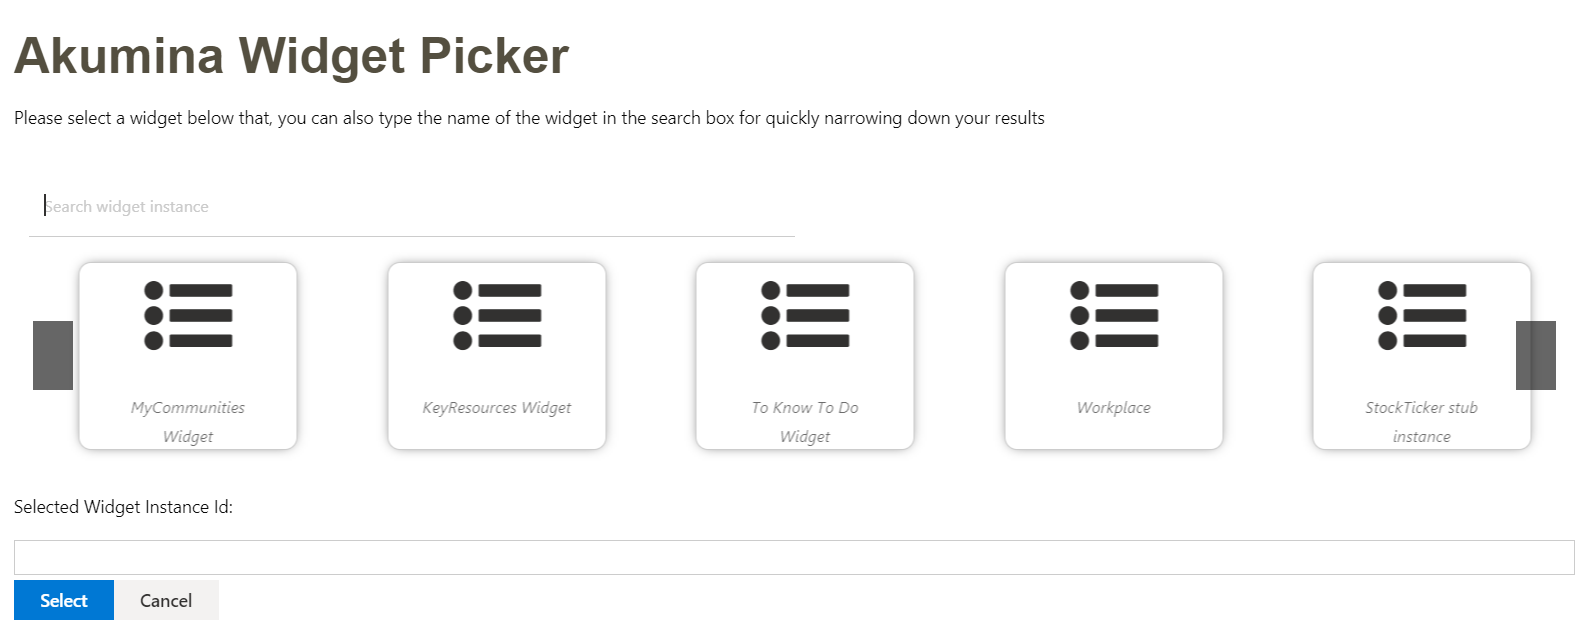
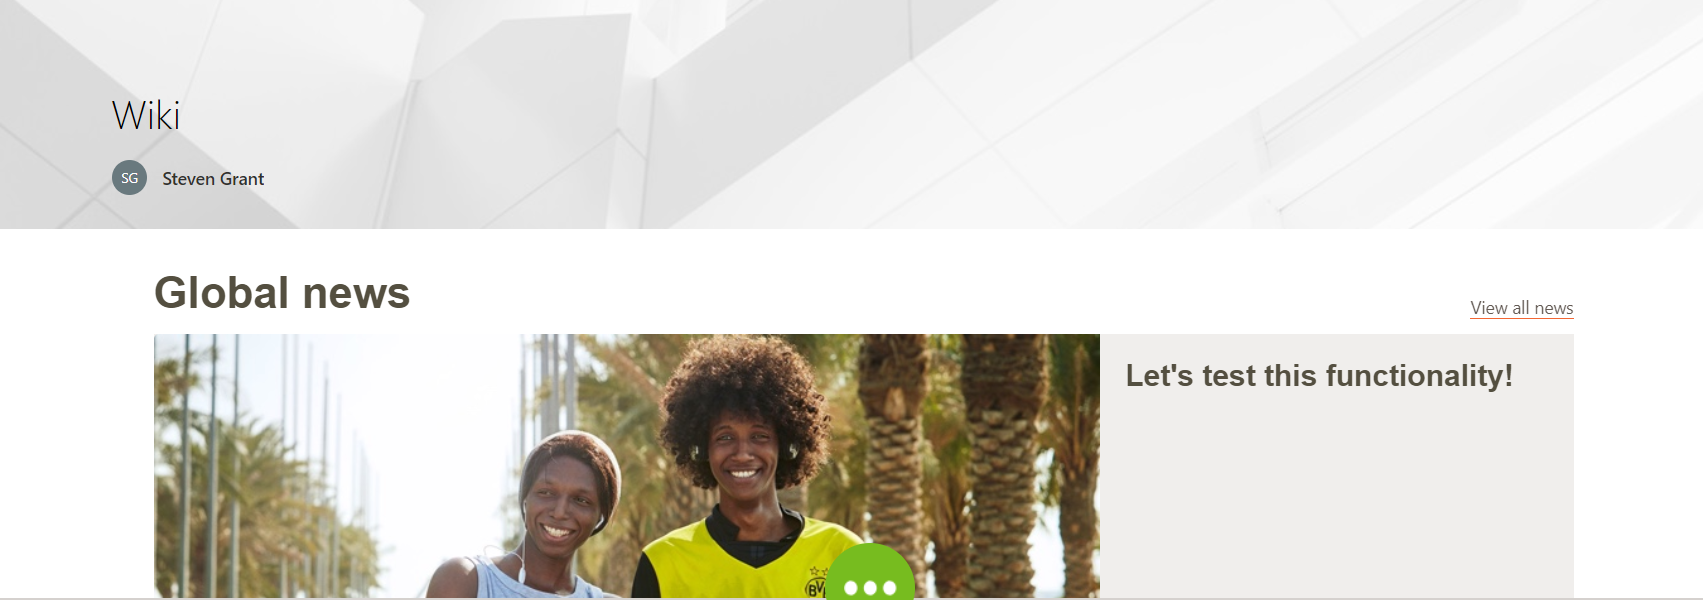
This will populate the Widget Instance ID. Click Save, then save the Sharepoint Modern page. When the page renders, you will see the Akumina Loading Grid and, finally, your widget will be visible:
Coming Soon
These features are planned to be released with Akumina Version 4.8 towards the end of February 2020.
Site Deployer
The Site Deployer has been updated with additional functionality. The high-level overview can be found on the Site Deployer page.
To supplement the Akumina Widget Picker application, it is now possible to effectively transpile an Akumina Virtual Page JSON file into a Sharepoint Modern page. This means you can easily configure Sharepoint Modern pages, and its contents, in the Virtual Page JSON format for ease of sharing, storage, and editing.
See https://akumina.github.io/docs/AK-Virtual-Page-Builder.html#json-file-format
The caveats to the implementation are detailed below:
- Limited Layout functionality
The Akumina Virtual Page structure supports a multitude of layouts. Currently, each Container (row) can support anywhere from one to six rows, excluding five, with varying styles. For instance, I can create a Container with two Zones (columns) of equal size or I can create a Container with two zones where the left zone is larger than the right zone. Unfortunately, Modern Sharepoint's layouts are confined to the following:
- One Column
- Two Column (large left/right)
- Three Column
To accommodate this, the Site Deployer will only support up to three columns. If your Virtual Page has more than three columns, an error message will display and the process will be aborted. In the scenarios where you deploy a Virtual Page with two columns using the large/medium options, they will default to the Modern Sharepoint layout of large left/right.
- Limited Content functionality
Because this functionality is an extension of Virtual Pages, we do not currently support entire content page structures. This means that the Virtual Page structure is only designed to hold widget/layout data and not static content such as disclaimers, raw text, other webparts, etc. This may be revisited in the future.